Managing Permissions with Permit.io in Nuxt 3 & Node.js (2024)
A practical and straightforward guide to get started with Permit.io in Nuxt 3

CTO of Allocations.com, a finance SaaS Miami-based, I am running a YouTube channel: @codewithguillaume. With 15 years of exp. as a freelancer, consultant, and Lead Developer, I have led dozens of engineering teams across Paris, London, and Berlin. I am father of 2 and I live in Dubai.
Welcome to this technical guide on how to use Permit.io with Nuxt 3. The goal is to create an application with Nuxt 3 and use Permit.io as a permission management tool.
Permit.io allows you to outsource your permission management to their online platform, making the management experience simpler and more intuitive for developers. It also adds an extra layer of security to your project.
You can also fork the monorepo here: https://github.com/guillaumeduhan/nuxt3-permit-monorepo
Create your account on Permit.io
First, you need to create your workspace on Permit.io. Through the onboarding process, you will also be asked to create your first resource. A resource here refers to a reference to a type of element you want to control, for example, a document.

Next, you can manage permissions for this resource. This is where the magic of Permit happens: the visual interface allows you to add, modify, or delete types of actions such as Create, Read, Update, Delete directly on the resource type.

Lastly, there are no permissions without roles. You can use basic roles like Admin and Viewer or click on the plus sign to create an additional one. At this stage, don't worry, you can modify all of this in the dashboard later.

Create your first role and first user
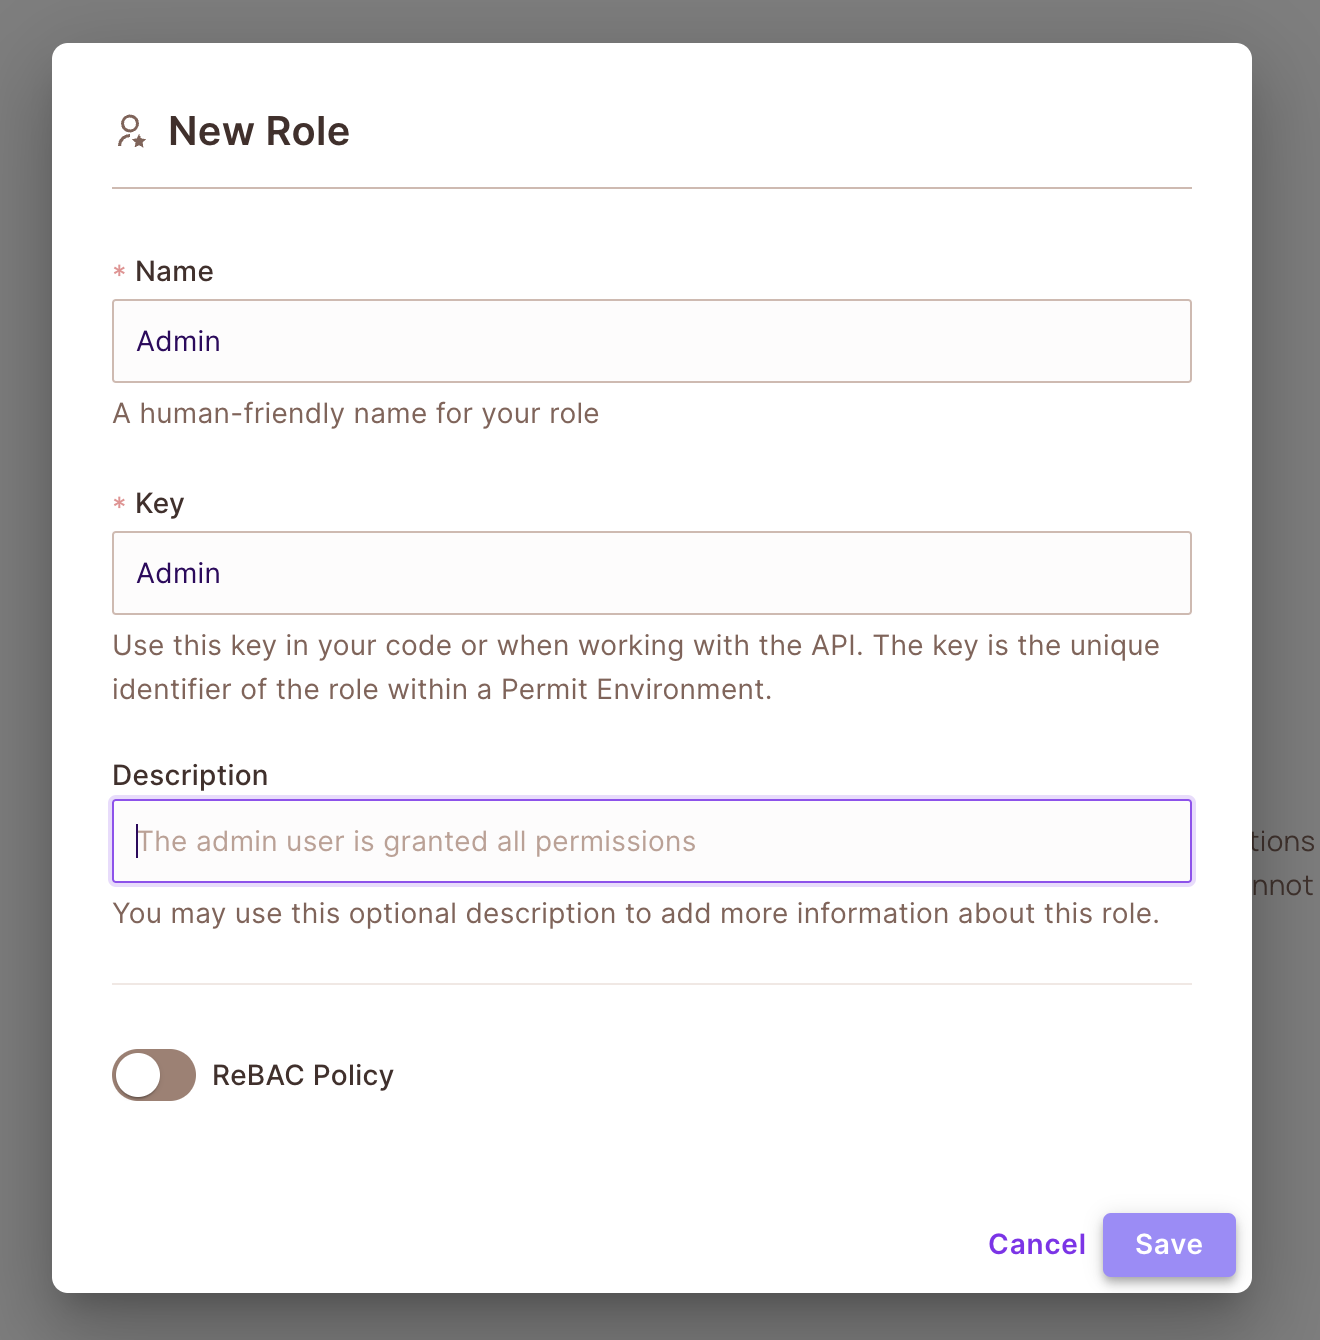
You can also create your first role by going to the Policy > Roles page. Then enter the name and key of the role you want to create. In our case, it will be Admin - Admin.
Now that we have our role, we can add our first user, who will serve as our admin. In our case, it could be my email, for example. To do this, go to Directory > Create a new user.

In RBAC Permissions, don't forget to assign the Admin role we just created. Once created, you have access to the list of users.

Create an API with Node.js
For security reasons, we want to externalize our calls to Permit.io. So, let's create a Node.js server that will communicate with our Nuxt app. This server will be used to check the permissions we configured earlier.
// node + express
mkdir node-permit
cd node-permit
npm init -y
npm install express permitio
Create a new app.js file at the root of project.
// terminal
touch app.js
This is where we will create our server that will handle requests via the Permit.io SDK to your session. To do this, we need to initialize the client with your API key, which you can find on the dashboard, and start the server. To find your API key, go to Settings > API keys or click on Copy API Key on Projects page.

Once that's done, we can create our POST endpoint that will receive the necessary elements to check permissions, namely user_key, action, and resource.
// app.js
const express = require("express");
const app = express();
const port = 4000; // will run on http://localhost:3000

app.use(express.json());

const { Permit } = require("permitio");

const permit = new Permit({
  pdp: "https://cloudpdp.api.permit.io",
  token: "YOUR_PERMIT_API_KEY"
});

app.post("/", async (req, res) => {
  // we receive user_id, action & resource
  const { user_id, action, resource } = req.body;

  // error handling
  if (!user_id || !action || !resource) {
    return res.status(404).json({
      status: 404,
      message: "Invalid permission request: missing user_id or action or resource."
    });
  }
  // check here
  const permitted = await permit.check(user_id, action, resource);
  // response
  if (permitted) {
    return res.status(200).json({
      status: 200,
      message: `${user_id} is PERMITTED to ${action} on ${resource}`
    });
  } else {
    res.status(403).json({
      status: 403,
      message: `${user_id} is NOT PERMITTED to ${action} on ${resource}`
    });
  }
});

app.listen(port, () => {
  console.log(`Listening at http://localhost:${port}...`);
});
In this example, we can see that we return a message that will be shown in our Nuxt 3 app. Start the server, and you can also test it using Postman. We are now ready to code our Nuxt 3 application.
Create your Nuxt 3 app
It's time to create a Nuxt 3 application. We'll stick to a simple application and add Tailwind CSS for styling, as well as SASS.
npx nuxi@latest init nuxt-permit-project

We will proceed in three steps. The first one involves organizing our application, using the Nuxt 3 router to display the pages of our application. NuxtPage is what we need here.
// app.vue
<template>
  <div>
    <NuxtPage />
  </div>
</template>
In the second step, we will create a pages folder and then an index.vue file. This page will be used to display the result of our request.
// pages/index.vue
<script setup>
const loading = ref(false);
const msg = ref('');
const user_id = 'codewithguillaume@gmail.com';
const action = 'read';
const resource = 'documents';
</script>

<template>
  <div class="container mx-auto my-2 text-center">
    <div v-if="loading">Loading...</div>
    <div v-if="!loading">{{ msg }}</div>
  </div>
</template>
As you can see, I'm initializing the values that I will send to my API to query Permit.io. I'm also toggling the display between a loading state and a reactive variable called msg. In the script, I will eventually make a request to an endpoint that I haven't created yet. This endpoint will be on my Nuxt app's backend side, allowing me to conceal the source of my API from potential hackers.
// pages/index.vue
<script setup>
const loading = ref(false);
const msg = ref('');
const user_id = 'codewithguillaume@gmail.com';
const action = 'read';
const resource = 'documents';

onMounted(async () => {
  loading.value = true;
  const response = await fetch(`/api/permission`, {
    method: 'POST',
    headers: { 'Content-Type': 'application/json' },
    body: JSON.stringify({
      user_id,
      action,
      resource,
    }),
  });
  loading.value = false;
  if (!response.ok) {
    throw new Error(`Request failed with status ${response.status}`);
  }
  const data = await response.json();
  const { message } = data;
  msg.value = message;
})
</script>

<template>
  <div class="container mx-auto my-2 text-center">
    <div v-if="loading">Loading...</div>
    <div v-if="!loading">{{ msg }}</div>
  </div>
</template>
Finally, this is the third step: I need to create a server-side endpoint in Nuxt 3 to query our Node.js API. I create a folder named api inside the server directory and create an endpoint named permission within it. Inside this endpoint, I call my API, acting as an intermediary between the front-end and the back-end.
// server/api/permission.post.ts
export default defineEventHandler(async (event) => {
  const {
    user_id,
    action,
    resource,
  }: any = await readBody(event);

  const response: any = await $fetch(`http://localhost:4000`, {
    method: 'POST',
    headers: { 'Content-Type': 'application/json' },
    body: JSON.stringify({
      user_id,
      action,
      resource,
    })
  });

  if (response.status === 200) {
    return response;
  } else {
    throw new Error(`Request failed with status ${response.status}`);
  }
})
It's time for testing, I start my Nuxt 3 application, and here's what appears:

Great! This user is Admin and has all rights. We can see that our user_key, our action and our resource have been checked successfully.
It's time to switch users and see if Permit responds correctly to the conditions set by the permissions I created earlier.
Let's now try to create a new role and a new user with that role. Let's call it Viewer.

We want that role to be only on read.

Back to our app, we switch our current email:
// pages/index.vue
const user_id = 'test@gmail.com';

But if we switch our action like this:
// pages/index.vue
const action = 'create';

Everything works perfectly. I can now use Permit.io dashboard to manage all my users permissions.
Permit.io allows us to easily and quickly manage user permissions by checking their permission level via their email, for example. It's a tool that is very easy to set up and extremely useful, especially when you consider that permission levels are often managed at such a high level that it can become complex for a team of developers to handle a project.
Guillaume Duhan


